2011/11/10

How to shrink a VHD Virtual Hard Disk file

Virtualization has become one of the most used features in personal computers and datacenters nowadays. Since the standalone application "Virtual PC 2007" back in Windows XP days up to current Hyper-V feature in Windows Server 2008, the amount of users has been steadily growing.

One of the big decisions you have to make whenever you create a new virtual guest is deciding the size and type of the VHD. It might seem a trivial decision at first, and maybe you just click on the default options and create a dynamic 127Gb VHD, either on purpose, by mistake, because you were in a hurry, or by ignorance. Maybe you just found it there, because someone else created it and you have to deal with it now.

Whatever the case, and after some time has passed, you might actually realize that the amount of virtual storage assigned to it is far away from being used. For example, maybe it is a dynamic expansion 127Gb VHD and after a year or two of usage, you see that its usage has leveraged at around 20Gb. You might think, well that's not an issue, it doesn't matter. Since it is a dynamic expansion VHD, it will grow whenever you need it, but if you actually see the .vhd file, it is sized much more that the expected 20Gb, it might be sized 80 or 90Gb, despite the fact that it has never reached that usage.

In a recent case, I faced a Windows Server 2008 Hyper-V host with 32Gb of RAM, 16 cores, running 10 virtual machines (Windows 2003 and 2008 mostly), and a couple of Ubuntu virtual servers, one of them used for running Cacti (whose graphics will be shown here).

The virtual hard disk files (.vhd files) were stored on a physical (RAID 1) 750Gb hard disk shown below.

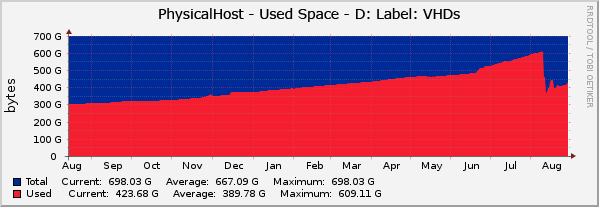
Evolution of hard disk usage in the host's drive containing the .vhd files

As you can see in the graph, the usage of this drive in the host has been growing and growing for a year, with an increase in the slope at the end of June. The problem was that almost all 10 virtual machines where defined with the default 127Gb dynamic expansion hard disks. If they would ever fill up their 127Gb of space that would mean 1270Gb of physical hard disk required in a 750Gb drive, which would be quite difficult to handle... ;)

The funny thing was that none of them ever used over 40Gb. That would mean 10 x 40Gb = 400Gb of expected usage in the host but it was, however, running out of physical space. What was happening?

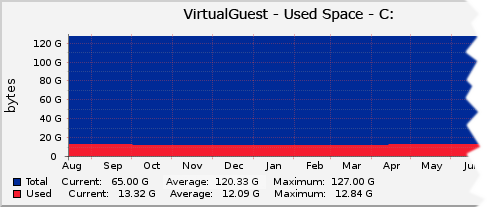
None of the 10 virtual guests had ever used more than 40Gb of their VHD space.

If you want the short version: blame on dynamic expansion. If you ever need to use dynamic expansion, be sure to define a small VHD, i.e. 10 or 20Gb will be enough, since a dynamic expansion VHD can be easily enlaged using Hyper-V built-in tools (Edit → Expand → Select new size → Finish).

If you want the long one, keep on reading.

How dynamic expansion Virtual Hard Disks work?

A dynamic expansion VHD is created differently as a fixed size VHD. The latter uses 100% of its size in the host from the creation time. That means that as long as you create a 127Gb fixed size VHD you will be losing 127Gb of your host's physical space because the .vhd file is sized 127Gb right from the start (even though it does not contain any data at all yet). There is a direct 1:1 correspondence between each byte in the .vhd file (from the host point of view) and its place inside the VHD (from the guest point of view), so that the host do not need to make any 'translation' when the guest requests a particular information from its VHD: The host does a simple calculation and knows exactly what point inside the .vhd file needs to read/written (because everything is defined beforehand, since it is a fixed size VHD, the order of the data is as simple as 1, 2, 3, ...).

However when you create a dynamic expansion VHD, it is initially very small in size, no matter the virtual maximum size you assigned to it. This is because the only content actually written it is a table of 'translations' for every cluster (or equivalent) and its order (placement) inside the .vhd file. So, whenever a read/write is requested by the guest, the host needs to do an extra step and read that table to see where inside the .vhd file the requested bytes should be read from/written to. Simply because they were not created at VHD creation time, but on the fly during the life of the guest, and their order is not known beforehand.

Furthermore, when a file is deleted in the guest, the .vhd file in the host does not get smaller. The host only marks that zone of the .vhd file as free in that translation table. It might (or not) be used again when more space is needed. That's why you only see your .vhd file grow and grow and if you want to shrink it you have to set the guest offline and do it manually using Hyper-V built-in tools (Edit → Compact). This operation rearranges the valid data inside the .vhd file freeing the space occupied by not used sectors (but still using space inside the .vhd file).

Warning: Do not ever install a defragger inside a guest, since moving data from one part of the VHD disk to another will only make the .vhd file bigger in the host. That was what happened at the end of June and that is the reason of the increased slope in the former graph. Someone installed a defragger in thinking it might help in the performance, whilst the results were just the opposite.

And now that the .vhd files are soooo big... how do I shrink them?

You cannot automatically shrink a .vhd file using Hyper-V built-in tools, but there is manual procedure you can follow:

How to shrink a VHD file? How do I make a VHD smaller?

1. Install a defragger on the guest (despite I advised you not to do it) and set it to 'everything off' (no real-time nor automatic defragging, so that it only runs manually when you need it to). Select the defragger of your choice, but make sure it has a feature called 'Prep for shrink' or something equivalent, which moves all data towards the beginning of the disk, as much as possible, despite it might produce fragmentation.


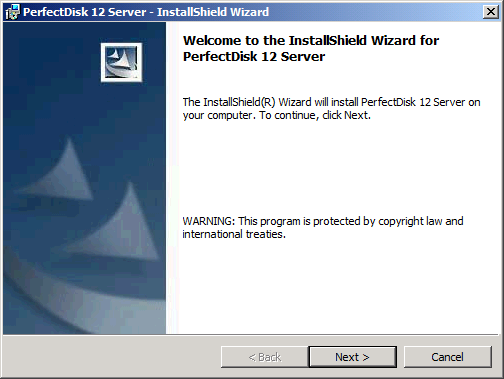
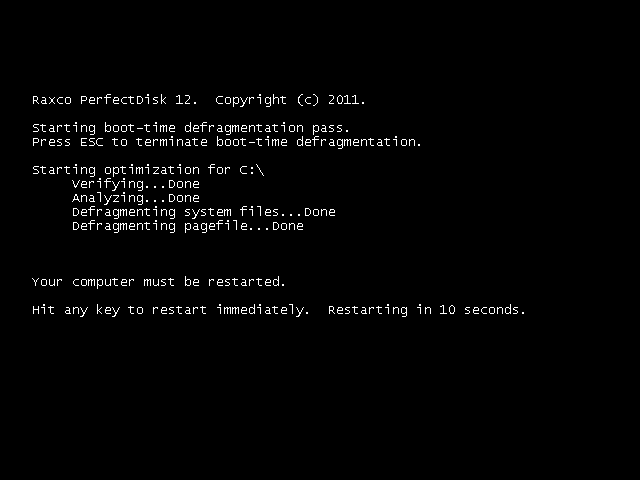
2. Run one or two passes using this 'Prep for shrink' defragmentation mode (in particular I use a 30 day trial of Raxco PerfectDisk 12 Server (or WorkStation if you are not shrinking a Server VHD), that you can uninstall after you have followed the following steps). You can download the trial from http://www.raxco.com/business/server.aspx


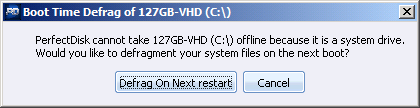
3. Make a boot-time defragmentation and make sure that the paging file (pagefile.sys) has been moved also towards the beginning of the disk. If not the case, configure the system so that it does NOT use page file at all and then let Windows decide the size of it. Doing so, we make sure the page file is deleted and created again (hopefully, nearer to the beginning of the disk).


4. (Optional) Execute a Zero Fill Free Space. In our case, we did not run it and we were still able to reduce the .vhd file.

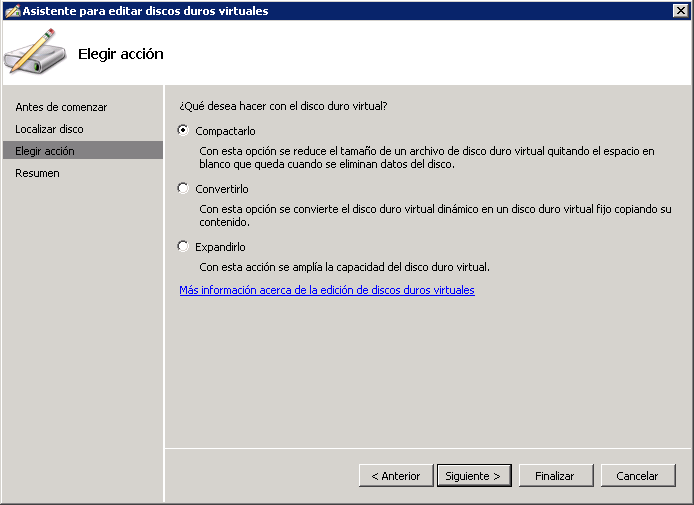
5. Stop the virtual guest and compact its .vhd file, through Hyper-V built-in tools (Edit → Compact).


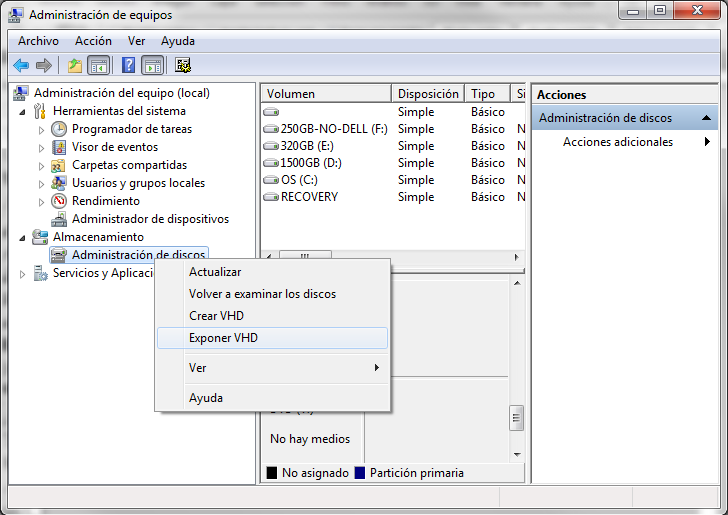
6. Start Disk Management snapin and click Action → Attach VHD and specify the location of the already compacted .vhd file. Be sure not to mount it in read-only mode.


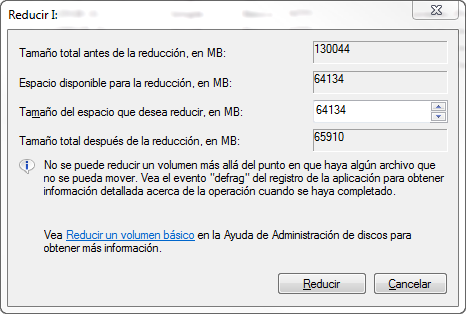
7. Right click on it and select 'Reduce volume'. A message telling that volume is being checked in order to calculate the limits is shown. Please wait. When the checks had finished you are shown a dialog with the limits the .vhd can be reduced. Leave the default values as they are and click 'Reduce'. You can do that from inside Windows 2008 Server with Hyper-V itself, or do it by copying the .vhd file to a Windows 7 computer (Windows 7 can also reduce the volume).


8. When the process has finished, unmount the VHD (right click and select Hide VHD). Now we have a VHD with unassigned space (the partition does not fill 100% of the VHD).


9. Run VHD Resizer and select the .vhd file. Write a different name for the output shrinked .vhd file. VHD Resizer checks the .vhd file and shows you the minimum size that the destination .vhd can be. Be sure to write (at least) that minimum value plus one or Resize button will remain disabled. Click on Resize and wait for the process to complete.


10. Modify the properties of the Virtual Guest so that it uses the new shrinked .vhd file instead of the original one, that you can keep for a proper retention period as a backup. Then start the virtual guest and check the size of the VHD.

11. (Optional) If you open Disk Management inside the virtual guest, you will see that there is some free unassigned space in the shrinked VHD. You can retrieve them and make the volume a bit bigger right clicking on it and selecting 'Extend volume'. By doing that the VHD will be shown exactly as the same Gb in size that you specified in step 9.


Note: I have not been able to shrink any VHD to less than half its initial size. In my cases they were 127Gb VHD with dynamic expansion and I managed to leave them at 65Gb only. That is because during the original installation of the virtual OS (Windows), there are some unmovable metadata files that are written at the middle of the disk: $Bitmap, $LogFile, $MFT, $MFTMirr and $Secure (in my case).


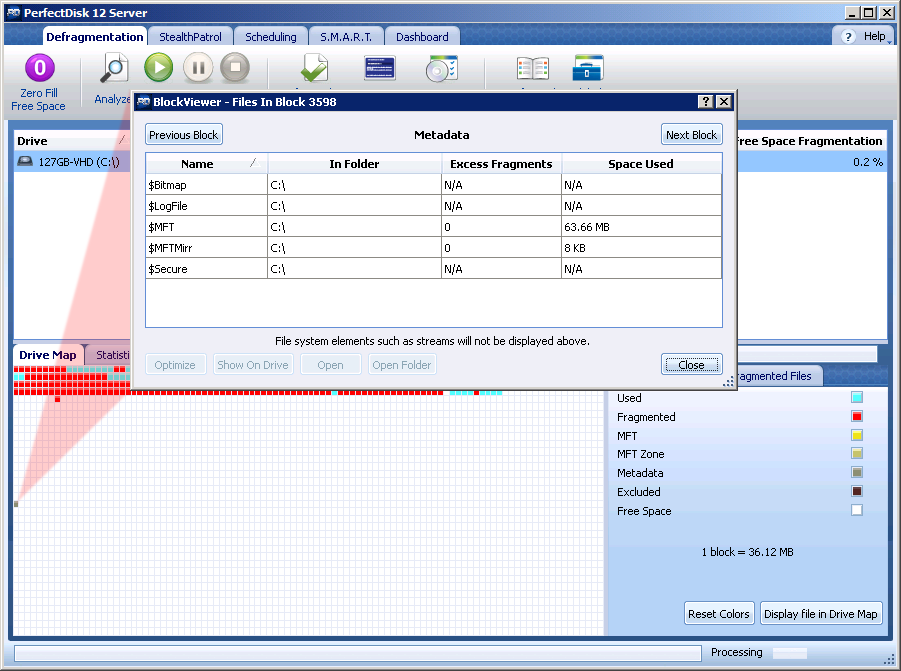
Since they cannot be moved elsewhere in the VHD during the Prep-for-shrink step (2), they are the only limiting factor to a greater reduction in the VHD shrink process.

Keywords.

vhd, hyper-v, shrink, size, dynamic expansion, virtual pc, windows server, smaller vhd

2009/11/21

Segmentation fault on Ubuntu 9.10 Server under Windows 7 x64 Virtual PC

I have been using Ubuntu since version 8.10 Intrepid Ibex and I was anxiously waiting the release of Ubuntu 9.10 Karmik Koala some weeks ago. In previous versions of Ubuntu it was a nightmare to have it running under Microsoft virtual environments (i.e. Virtual Server 2007, Virtual PC 2004, Virtual PC 2007 and so on). Problems with screen resolutions, bouncing mouse cursors, and skewing clocks were common and somewhat hard do solve for a novice Linux user I was by those times.

The fact is that I tried Ubuntu 9.10 Server beta, some weeks before the final version was released, under Virtual PC 2007 on Windows Vista Ultimate x64 on my desktop computer. When the bare bone LAMP server was installed, I logged in and installed gnome-desktop, crossing fingers. I was gladly surprised that everything worked fine right after the reboot: no screen flicking, no bouncing mouse, all Ok. Great. It was still the beta but it was a promising start.

When the final version of Ubuntu Server 9.10 was released, I downloaded the ISO and tried to install it on my laptop, a Windows 7 x64 with Virtual PC, the one shipped with Windows 7, not Virtual PC 2007 that you must use in Vista. All my expectations felt helplessly to the mud.

Everything seemed to be fine when the installer told me to reboot the system for first time:

Installation is complete

I rebooted the virtual machine and … oops… segmentation fault. what? I rebooted once again, and the same error: segmentation fault. Sometimes the virtual machine window simply closed, if not, the console showed me the same error: Segmentation fault and rubbish all along the screen.

Segmentation fault 1

Segmentation fault 2 Segmentation fault 3

There was no way I could run Ubuntu 9.10 Server under Virtual PC from Windows 7 x64. I tried various different install configurations (LAMP, DNS, nothing at all), with different RAM sizes, I even tried to change some settings in the guest BIOS, without any luck. In all cases, when the machine booted, I get the segmentation fault error.

After reading some documentation about the general occurrence of a segfault error, and finding that it happens when the code being execute tries to read/write some memory allocation that it should not, or an invalid memory address.

It sounded me like something dealing with Data Execution Prevention or DEP. You can find those settings in your Windows 7 under System Properties –> Advanced Options –> Performance settings –> Data Execution Prevention.

I tried to disable Data Execution Prevention for %windir%\system32\vpc.exe (the executable file for Virtual PC) but since it was a 64bit system I got an error message: You cannot set DEP attributes on 64 bit executables. No luck this way either.

According to Microsoft about Data Execution Prevention:

32-bit versions of Windows Server 2003 with Service Pack 1 utilize the no-execute page-protection (NX) processor feature as defined by AMD or the Execute Disable bit (XD) feature as defined by Intel. In order to use these processor features, the processor must be running in Physical Address Extension (PAE) mode. The 64-bit versions of Windows use the NX or XD processor feature on 64-bit extensions processors and certain values of the access rights page table entry (PTE) field on IPF processors.

XD processor feature? Umhhh, my BIOS (the laptop, physical one) had such a thing… My laptop is a Dell Vostro 1700 and it has a setting called CPU XD Support. Why don’t we try to disable it? I rebooted to check that setting and I saw that it was Enabled (by default). Just for doing one more test, I disabled it and restarted.

CPU XD (Execute Disable) Support

I then started the Ubuntu 9.10 Server virtual machine and… it worked!!! I was even capable of installing gnome-desktop also and everything worked as it worked with Windows Vista in my desktop computer.

But is it safe to disable such a feature for the whole system? Just to be able to try and play with Ubuntu as a VM sometimes? I suppose not. I then rebooted and reset the value to Enabled (by default).

There must be something wrong with either Ubuntu or Virtual PC. Maybe Ubuntu is trying to execute certain memory address that are code for the guest, but data for the host. I don’t know.

At least, I have found a workaround for the problem. Whenever I want to test something in Ubuntu, it costs me a reboot, a change of settings in CPU XD Support value of the BIOS and a restart… ah.. and another reboot to change it back to the safe value.

If someone else finds a better workaround for this problem, I am willing to hear about it!

2009/10/30

Windows 7: Disable builtin DHCP server for “Internal network” in Virtual PC

I recently installed Windows 7 and I have been waiting for the final release of XP Mode and Virtual PC which occurred last 22nd of October. I previously had (in Windows Vista and using Virtual PC 2007) a virtual domain, composed of virtual machines such as:

  • server2003: a domain controller and DHCP server, with fixed IP address, connected to the “internal network” of Virtual PC.
  • isa2006: with two interfaces (dual homed), one connected to the physical host network adapter (for connecting to the internet), the other one connected to the “internal network”. Both IPs are manually set.
  • sql2008: the database server for the tests with this virtual domain, IP address assigned dinamically through DHCP.
  • vs2008xp: a Windows XP with Visual Studio 2008, belonging to the domain for testing and developing, IP configured through DHCP (that should be handled by server2003).

With such a testing environment, all traffic that should go to/from the internet passes though isa2006. If isa2006 is not running (for instance) the virtual domain is isolated and the virtual machines can only see themselves (members of the domain).

This was the scenario that I had configured in my old Vista using Virtual PC 2007 and wanted to reuse the .vhd files so that I do not need to rebuild the playground from scratch again.

It was quite simple, I just recreated every single virtual machine using the wizard, and when asked for the hard disk, I selected ‘the existing one’ instead creating an empty one. Then, when the machine was first started, I reinstalled the Virtual Machine Additions (now called Integration Components), and after a couple of restarts everthing seemed to be working… but it only seemed.

Then I realized that sql2008 and vs2008xp (both were configured to use dynamic IPs using DHCP) cannot browse the internet, nor ping any other server in the domain. They were using the “Internal network”, but their IP addresses were not assigned by the DHCP running in server2003, since they were not in the expected range/mask.

After Gooling for a while I learned that Virtual PC has its own builtin DHCP server and it seems it is (incorrectly) enabled for the “Internal network”. Fortunately there is a fix for it:

  1. Turn off or hibernate all your running Virtual Machines.
  2. From the Task manager, kill vpc.exe if it does not exit on its own.
  3. Edit "%localappdata%\microsoft\Windows Virtual PC\options.xml"
  4. Search for the “Internal network” section, and then inside the <dhcp> section, disable it: <enabled type="boolean">false</enabled> and save the file. You can keep a backup of the original xml file just in case.
  5. Turn your VMs and verify everything runs as expected.

2009/10/11

URL Canonicalization with 301 redirects for ASP.NET

There are lots of pages talking about the benefits of canonicalization (c14n for short). It is a common agreement that it is just a set of rules in order to have our pages indexed in the most standardized, simplified and optimal way as possible. This would allow us to recollect our PageRank instead of having it spread among all the possible combinations of writing an URL for a particular page. In this post we will cover some canonicalization cases and their implementations for our IIS server running ASP.NET.

These different cases include:

  • Secure versus non secure versions of a page: Are http://www.example.com and https://www.example.com the same?
  • Upper and lowercase characters in the URL: Are ~/Default.aspx, ~/default.aspx and ~/DeFaUlT.aspx the same page?
  • www versus non-www domain: Do http://example.com and http://www.example.com return the same contents?
  • Parameters in the QueryString: Should ~/page.aspx?a=123&b=987 and ~/page.aspx?b=987&a=123 be considered the same? Are we handling bogus parameters? What happens if someone links us with a parameter that is not expected/used such as ~/page.aspx?useless=33 ?
  • Percent encoding: Do ~/page.aspx?p=d%0Fa and ~/page.aspx?p=d%0fa return the same page?

If your answer is yes in all cases, you must keep on reading. If you only answer yes in some cases, this post will be interesting for you anyway; you could skip those points that do not apply in your scenario by just commenting some lines of code, or modify them to match your needs. Sample VS2008 website project with full VB source code is available for downloading.

In our sample code we will be following these assumptions:

  • We prefer non-secure version over secure version, except for some particular (secure) paths: If we receive an https request from a non-authenticated user for a page that should not be served a secure, we will do a 301 redirect to the same requested URL but without the secure ‘s’.
  • We will prefer lowercase for all the the URLs: If we receive a request that contains any uppercase char (parameter names and their values are not considered), we will do a permanent 301 redirect to the lowercase variant for the URL being requested.
  • www vs. non-www should be handled by creating a new website in IIS for the non-www version and placing there a 301 redirect to the www version. This case is not covered by our code in ASP.NET since it only needs some IIS configuration work.
  • The parameters must be alphabetically ordered: If we receive a request for ~/page.aspx?b=987&a=123, we will do permanent redirect to ~/page.aspx?a=126&b=987, since the alphabetic sort a is before b. Regarding lower and uppercase variants either in the name of the parameter or the value itself, we will consider them as being different pages, in other words, no redirecting will be done if the name of a QueryString is found in upper/mixed/lowercase. The same would apply for the value of those parameters: ~/page.aspx?a=3T, ~/page.aspx?A=3T and ~/page.aspx?a=3t will be considered as different pages, no redirection will be done. In pages that accept parameters extra coding must be done to check that no other than the allowed parameters are used.
  • We will prefer percent encoded characters in their uppercase variant, for that reason %2f for instance will be redirected to %2F whenever they appear in the value of any parameter. This way we follow RFC 3986 that states:
    Although host is case-insensitive, producers and normalizers should use lowercase for registered names and hexadecimal addresses for the sake of uniformity, while only using uppercase letters for percent-encodings.

<link rel=”canonical” …>

Last february 2009 Google announced through their Google Webmaster Central Blog a way for you to explicitly declare your preferred canonical version for every page (see Specify your canonical ). By simply adding a <link> tag inside the <head> section of your pages, you can tell spiders the way you prefer them to index your content, the canonical preferred way. This helps to concentrate the GoogleJuice to that particular canonical URL from any other URL version or URL variation pointing to it in this way (the link rel=canonical way). This very same method was later adopted by Ask.com, Microsoft Live Search and Yahoo!, so it can be considered a de facto standard.

We will adopt this relative new feature in our sample code. Most of the times we will be using permanent 301 redirects, but there might be cases where you may not want to do a redirect and simply return the requested page as is (with no redirection) and return the canonical URL as a hint for Search Engines. Whenever we receive a request for a page, including bogus parameters in the query string, we will handle the request as a normal one but we will discard the useless parameters when calculating the link rel=canonical version of the page.

In particular, if you are using Google Adwords, your landing pages will be hit with an additional parameter called gclid that is used for Adwords auto-tagging. We do not want to handle those requests differently, nor treat them as errors in any way. We will only discard the unknown variables when creating the rel=canonical URL for any request.

Related links.

Internet Information Services IIS optimization
Are upper- and lower-case URLs the same page?
Google Indexing my Home Page as https://. 
http:// and https:// - Duplicate Content? 
SEO advice: url canonicalization

Q: What about https and http versions? I have a site is indexed for https, in place of http. I am sure this too is a form of canonical URIs and how do you suggest we go about it?
A: Google can crawl https just fine, but I might lean toward doing a 301 redirect to the http version (assuming that e.g. the browser doesn’t support cookies, which Googlebot doesn’t).

Specify your canonical

Keywords.

canonicalization, seo, optimization, link, rel, canonical, c14n, asp.net, http vs. https, uppercase vs. lowercase